Felonmarming is what a felonmarmer does.
Showing posts with label Tomorrow's War. Show all posts

Sunday, 8 July 2012

Actually Fighting in an Asteroid

Here is an after action report of a skirmish in an asteroid using my asteroid enclosure fighting rules (modified slightly following input from Mr Rubber Suit Theatre on the TMP forums to reduce the Coriolis effect. The only weapons affected by the Coriolis effect would be low velocity snub weapons used by the miners and two teams of specialist zero-G assault troops on the marine side who have entered the tunnels from the exterior of the asteroid rather than disembarking in the main ship docking area.
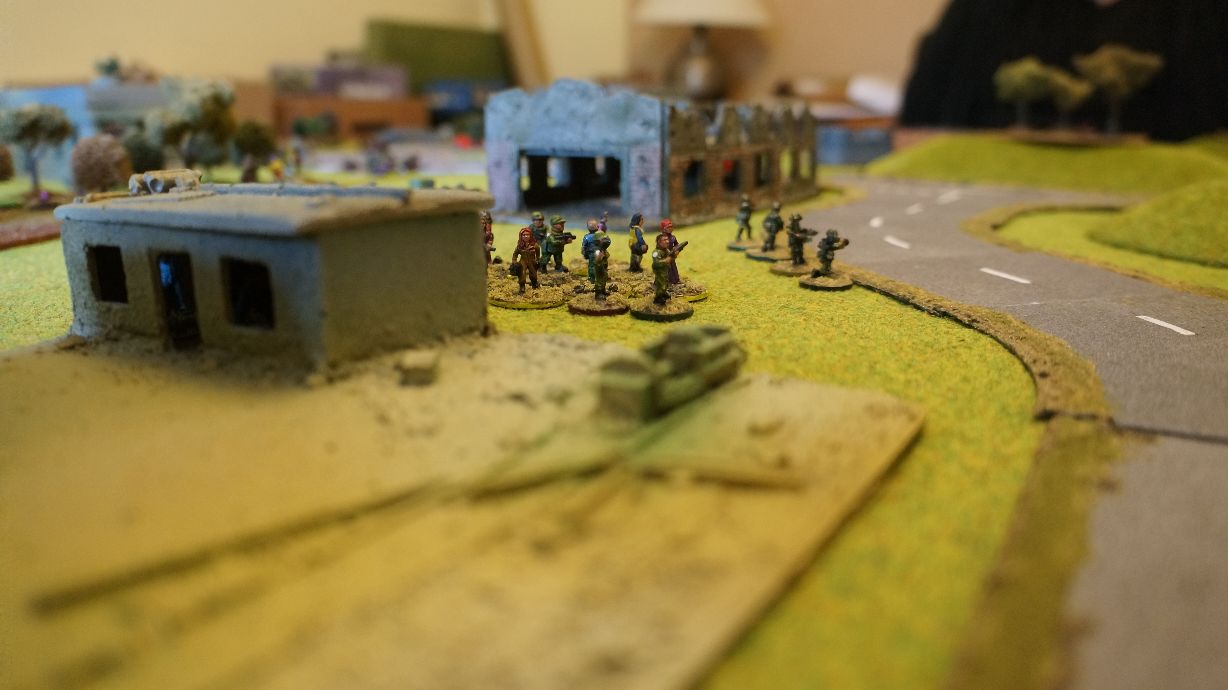
2 Harook Grav tanks await the attack, assisted by the miners heavy laser vehicle. A warped photo to try and show what the terrain is meant to portray.
Background

The background to the attack is that following the Fifth Frontier War a rebellious bunch of asteroid miners (or Belters as they like to be known), take the opportunity to take over a Sword Worlds controlled asteroid habitat for themselves. The Sword World marine force, still reeling from their defeat in the war against the Imperium attempt to retake the asteroid. After securing the docking area they move on to take the main enclosure and the underground tunnel complex.

The marines can only enter from the main gate or from one of nine access ducts scattered about the enclosure. To fight their way through the tunnels they have to roll 1D6 + (the number of attacking teams in the tunnels) - (the number of defending teams in the tunnels). The result is the number of teams that can enter the enclosure from a random location (1d10, 1-9 = the duct rolled for, 10 = lost in the tunnels)

The miners sent the majority of their forces down into the tunnels, leaving the Harook to defend the main enclosure, however the marines ignored the tunnels save for their two teams of specialists and attempted to overwhelm the defenders in a mass charge straight out of the main gate.

Photos of the Battle

The view from the fields
The overgrown biodome
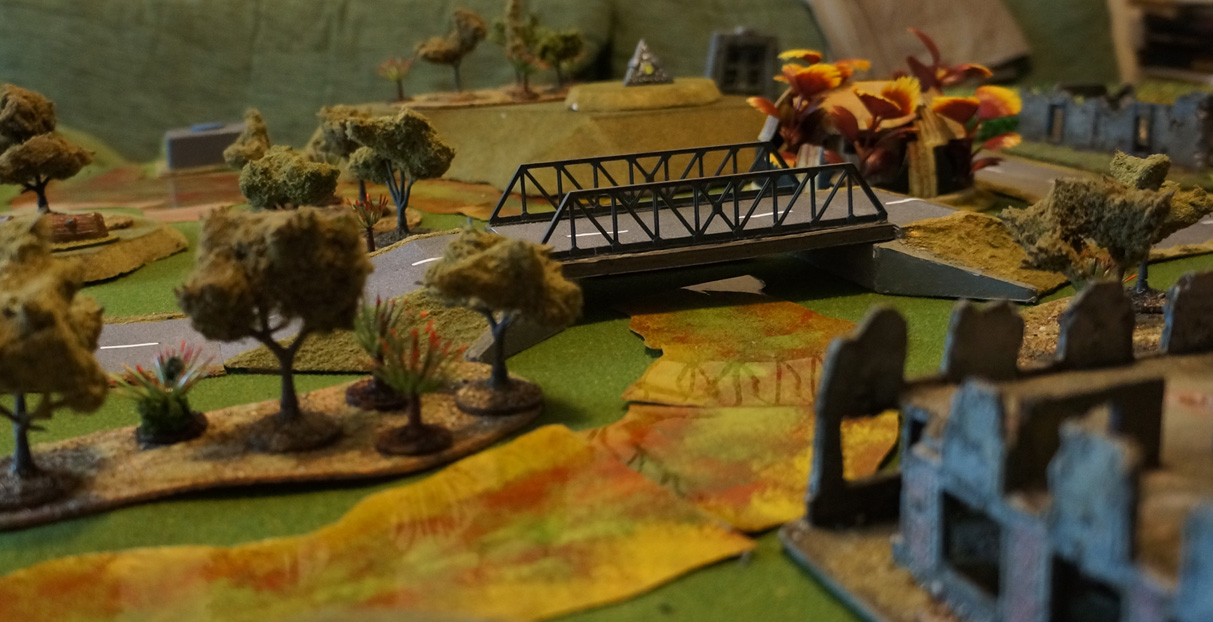
Bridge over the River Why
Bridge and Biodome
Main Street
The Harook arrive
Harrok grav tank takes off
Preparing for the attack
Harook in the trenchs
The rebel miners HQ. Most of the miners are down below fighting the attackers in the tunnels leaving the Harook mercenaries to hold the main enclosure. The Harook have an aversion to close tunnels and much prefer the open air
A Harook squad defends the ruins with the assistance of one of the grav tanks
The first attack is halted by the Harook grav tanks.
The rest of the assault troops rush through the main gate and are pinned down. Finally some success as the HAMR sniper team destroys the miners laser vehicle
The marines assault grinds to a halt in the fields as the Harook squad in the "Chicken House"fend of repeated attacks taking very few casualties with the assistance of grav vehicles and flanking squads on overwatch. At the top of the photo is the remains of the marines ATGM armed remote controlled Infantry Support Robot. The ATGM turret was disabled by laser fire from one of the Harook grav tanks whose armour managed to defeat the only shot the robot got off. The marines command squad hide in the building next to the main gate, while their assault squads suffer in the fields.
View from the "Chicken House" of the advancing marines
The marine DIMOG unit charges down the road from the main gate and engages the Harook Treehouse
The marine tunnel squad battles through the underground maze and enters the the enclosure in some ruins at the rear of the Harook defences. Unfortunately for them the Harook are reinforced by miners exiting the tunnels on the other side of the table who run step from one side of the table to the other across the joined edges and the combined force manages to pin down the attackers. The blue disk is a service duct entrance (number 3), made by sticking a printed out manhole cover to a 2 pence coin.
The battlefield scene just before the marines withdraw back to the main gate to make new assault plans.
The Aftermath

The marines withdrew with heavy casualties. They did however manage to destroy the miners heavy laser vehicle as well as destroying the main gun on one of the grav tanks. The DIMOG was eventually destroyed as well as the ATGM turret on the walker robot.

The Rules

The curvature rules took a little getting used to and the Coriolis effect never came into play as the range that the low velocity weapon armed troops engaged in was too close for it to apply.

Once again I (and my opponent) struggled with the Tomorrow's War rules. The fact that a unit can react and react and react (only losing 1 FP for each additional reaction) does seem to make defenders incredibly powerful, add in a couple of units on overwatch who can join in the firefight and it gets very one sided for the initiative side.

The other main gripe with the rules is the difficulty in finding the rules you want, the index is appalling as it lists every mention of the term you want to look up, not highlighting the main section of the rules. The standard way of doing this is to put the page number of the main section in bold so you don't have to wade your way through every mention of the word Overwatch (for example), something that the authors do not seem to be aware of.

I have to say that the scenarios in the rule book are carefully thought out, with the forces and victory conditions nicely balanced to suit the rules. Maybe its my unfamiliarity with the rules that makes it difficult to create a balanced scenario.

The only thing to do is write my own set of rules I reckon, at least then I'll know how they work!


Tuesday, 3 July 2012

Fighting inside an asteroid

Doesn't it look peaceful...
Most SciFi wargames take place in a very terrestrial landscape, and tend to suffer from the terrain equivalent of the monster in the rubber suit effect. Now all this can be justified, after all why else would people (or aliens) be fighting over territory unless it was worth taking, which means it would have to be semi terrestrial at least.

So the idea of this post is to explore the possibilities of combat in a less terrestrial like environment, that of an asteroid habitat.

...we can soon fix that!
Asteroid habitats are made by hollowing out an enclosure within a largish (kilometre long) asteroid, spinning it along its axis for gravity and then terraforming the interior.

So there's a few issues you need to work out to wargame combat in an asteroid habitat. I'm going to work out some additional rules for Tomorrows War to deal with this and hopefully soon, depending on the outcome of the next few sessions of my Traveller Campaign, try out the rules in a game.

So here come my draft (and hopefully not too daft) rules...

The Asteroid

The inside of the asteroid will be a 6" x 4" table, rolled up so the two short edges are touching. Based on a ground scale of 1:500 this would give a cylindrical asteroid enclosure with a radius of 143m and a length of 600m.

Tomorrows War does not have a stated ground scale, but its obviously not 1:1 with figure height as that would mean that the unit cohesion distance (1") would be 2.5m. That's a little close for infantry spacing. At 1:500, this distance is 12.5m which is a little more realistic.

This asteroid is going to have a simulated gravity of 0.33G, this means that the surface is moving with a speed of 21.5m, spinning with a period of 41.8 seconds.

Rule 1 : Topology

The easiest way to model the interior is to say that the table surface is wrapped around the inside of a cylinder. If you move a unit off a short edge of the table, then it comes on at the other short edge. The long edges end in vertical cliffs and are impassable except by doors into the rocky shell of the asteroid, leading to the power rooms, living quarters and ship bays perhaps.

Rule 2 : Curvature

This may seem obvious, but as the inside is curved, units will be able to see over obstacles in certain directions. Obstacles will have a dead ground shadow as shown in the following diagram.

A unit at A can see over the building B to a certain extent, unit C is hidden but unit D is exposed. The length of the dead zone Z is dependant on the degree of curvature, the height of the obstacle H and the distance D from the obstacle. This only applies along the long axis of the table, looking along the short axis, any obstacle will block visibility completely.

This table gives the distance in inches of the Dead Zone (Z) for various distances (D) from the obstacle. The height H of the obstacle is in figure heights (based on 15mm miniatures).This is based on the 143m radius asteroid described above.

Distance D
Height H 1 2 3 4 5 6 7 8 9 10 11 12
1 1 1 0 0 0 0 0 0 0 0 0 0
2 4 2 2 1 1 1 1 1 1 1 1 1
3 7 4 3 2 2 2 1 1 1 1 1 1
4 9 5 3 3 2 2 2 1 1 1 1 1
5 11 6 5 4 3 3 2 2 2 2 2 1

Rule 3 : The Coriolis Effect

The Coriolis Effect is caused by the rotation of the asteroid. Its effects will be felt in movement and shooting. Treat all movement in the asteroid as low grav (roll Troop Quality to move fast) but with a modifier of -1 on the roll, unless the units are used to the condition inside a rotating asteroid (home team advantage!).

The Coriolis Effect will also affect shooting: as the surface is moving then by the time your bullet gets there, the target will have rotated out of the way. In the case of this asteroid, if the round takes a second to get there then the target will have moved 21.5m. The following table shows the reduction in firepower based on range and speed of projectile.

Lasers No effect
High Velocity Weapons -1 FP per 6"
Medium Velocity Weapons -2 FP per 6"
Low Velocity Weapons -3 FP per 6"

Laser weapons are obvious. High velocity weapons are hypersonic weapons like gauss guns, high power sniper weapons etc. Medium velocity weopons are typical supersonic assault weapons. Low velocity weapons are zero G snub weapons, accelerator (rocket) rifles, bows and the like.

You can counteract the effect by using guidance and or advanced computerised sighting. Each of these reduces the negative effect by one level (so a guided rocket rifles with computerised sights would only be reduced by -1 FP per 6").

The FP reduction is off the total FP for the unit firing based on the majority of weapon types in the unit in question.

Rule 4 : The Light Cylinder

The asteroid may have a "Light Cylinder". This is a transparent, perspex like cylinder running along the axis of rotation. The purpose of the cylinder is to illuminate the interior of the asteroid. Mirrors bounce sun light down the cylinder which then illuminates the enclosure. The cylinder can also be used for artificial rain by sprinkling water from it.

This means that it blocks line of sight for any unit directly above it, so for the asteroid in question any unit 36 inches +/- 3 inches further up the table is blocked from view by the cylinder and/or its glow.

Rule 5 : Flying Things

I'm sure they'll be affected but right now I'm, not sure how.

Anyway all comments and suggestions welcome

Sunday, 8 April 2012

Bugs in the Reactor AAR

I ran the Bugs in the Reactor scenario from Tomorrow's War on Saturday. I controlled the small colonist security force, Rob was in charge of the Legionnaire Force and Euan was the Alien commander.

As the aliens were counted as Irregulars they seemed to have all the disadvantages of not ever being able to win initiative without the usual benefits so I added a reinforcement option to the scenario - at the end of every turn the aliens could reclaim 1D6 killed aliens and when enough had been reclaimed for a group of 5 they would come on from a random hot spot, there was one in each quarter of the table and one positioned by the alien commander numbered 1 to 5. The alien commander would roll to see which point the reinforcements would arrive, on a roll of 6 the commander could chose which point to enter the table from.

To account for most of the buildings being ruins we said an earthquake had just happened (caused by Bugs tunnelling under the reactor) and the legionnaires were on there way to rescue the colonists from the ruins when they got reports of something far worse occurring.

In addition a media team were present in the area and we would allocate extra points to either side for any action in that sides favour occurring within 6" of the team. At the end of the turn we would roll to see which side could move the media team.

If anyone wants the squad record cards they are here in Open Office format.

Table Setup
The West Side of the Battlefield
The East side of the Battlefield
The Security Force set up first within the residential area facing the reactor complex with two small teams and a converted tractor vehicle mounting a gauss machine gun. The aliens then set up in the reactor complex, lurking amongst the buildings and landscaping. Then the colonists were placed, 30 of them, in the residential area - the two sides taking turns to place each one.

Looking East along the main road
Building 1
Reactor Complex Car Park
Reactor Cooling Pond
Reactor Buildings
Farmland
The Culvert
The west end of the table
Building 1
Turn 1

The legionnaire force comes on table from the southern road and move up ignoring the cries for help from the citizens hiding in the farm buildings. The security forces fall back into Buildings 2 and 3 to escort the colonists hiding there to safety. The patrol vehicle goes on overwatch coving the approaches from the reactor.

The aliens burst across the road attacking the colonists outside of Building 1 (who flee), the colonists standing around waiting to be interviewed by the media team and towards the hill overlooking the road junction. The alien King (or Queen) rushed forward from behind the Power Plant building catching the security forces by surprise who fail to zap him(or her) with the patrol vehicles gauss cannon. The media team catch it all on camera giving the aliens a bonus victory point. The colonists in the open flee into the Wooded Park.


Turn 2

The legionnaires move up to Building 3 and the hill overlooking the road junctions where they engage the aliens crossing the road. The aliens in the open are engaged by a legionnaire fireteam outside of Building 3 killing 3 of the group, all recorded by the media team for a bonus point to the humans. Meanwhile one of the security teams leaves Building 3 with a bunch of the colonists. The other team is busy collecting the colonists from the two floors of Building 2.

The aliens burst into Building 1 and engaged the colonists hiding inside in close combat, the colonists managed to hold them off for a round of fighting before going down. The carnage was picked up by the media team giving the aliens another bonus victory point.

Turn 3

 The legionnaires fully occupy Building 3 and set up overwatch teams on the roof all the while fighting off alien attacks from across the road. The aliens manage to enter the building and overpower one of the fire teams. Meanwhile the legionnaire team on the hill manage to hold off repeated attacks from the road. The security team leave Building 2 with some more colonists, and lead them to the scared colonists milling about by the Wooded Park. Meanwhile the media team decide to go and investigate the munching sounds coming from Building 1.

Turn 4

The legionnaire manage to rescue their comrades in Building 3, killing the last alien inside the building before it could eat anyone else.  The security team move on to the Farm Buildings picking up more colonists while the patrol vehicle moves off to cover the first group of colonists heading for the starport.

The King and Queen aliens attempt to move from behind the Reactor to the hill adjacent to it, The King (or Queen) gets past without the overwatch team on the roof of Building 3 reacting, but the Queen (or King) following on gets caught in the open and killed. 

The aliens in Building 1 attempt to charge the journalists but fail, confused by their approach ("I see you're being eaten alive by these hideous aliens, tell me, how do you feel?"). The media team come to their senses eventually and move away into Building 2.


Turn 5

 The evacuation continues, Building 3 becoming a strongpoint covering the road junctions and the front of the reactor complex with multiple teams on overwatch on the roof. The aliens follow the media team to Building 2 and finally overcome their camera shyness and eat them. They also finish off the colonists hiding in the Wooded Park.

Turn 6

More attacks on Building 3 are halted by concentrated fire from the overwatch teams. The security team moves on from the Farm Buildings. There are escorting so many colonists now I make a ruling that they need to make a Troop Quality roll if they wish to move quicker than walking (which they then fail to make until the last turn).


Turn 7

One of the aliens attacking Building 3 seems unstoppable and managed to gain entrance killing one of the legionnaires before finally being defeated.

Turn 8

The rabble continues their slow progression across the table, the patrol vehicle taking up position on the hill overlooking the junction where it engages, with limited success, a group of alien reinforcements moving towards the culvert in an attempt to cut off the colonists retreat.

Turn 9

The colonists reach the stream and take their time crossing. The vehicle moves to cover the culvert. The aliens hiding in the culvert decide not to charge (luckily as the patrol vehicle cannot fire on the same turn it moved).
Turn 10

The legionnaires fall back from Building 3 closely pursued by the aliens. The patrol vehicle goes on overwatch covering the culvert and the colonists finally manage to get off table.

Turn 11

The legionnaires continue to fall back, pursued by the aliens who are now lacking conviction as they realise that most of their food source has got away.

Turn 12

One of the final actions as a legionnaire team holds off alien charges as they get trapped behind the alien forces as the rest of the detachment moves to the departure point.

Conclusion

The game was an overwhelming victory for the humans in terms of points with most of the colonists getting away along with the majority of the security and legionnaire forces.

The aliens were hampered by poor reinforcement rolls, both in the numbers arriving (although by the end of the game they had recovered most of their losses) and in the location they arrived. They also failed to charge a number of times against the odds.

The vehicle failed to make much of an impression in terms of casualties but may have put off the aliens from attacking.

I've got some issues with the rules - the reaction system works well, but the morale system doesn't seem to work particularly well. Also the rules suffer from being hard to read, not helped by me mis-remembering where on the page tables were as I flipped through the book over and over (I was remembering where the table was in the Force on Force rule book instead). The index too needs some work, every page where the subject is mentioned is listed along with the main one where the rules are - the main page reference should be emboldened to help find the rules you are looking for.